General Photo Guidelines:
1. Setup
- 📍 Background: Stand in front of a plain wall (white, beige, or light color). Avoid clutter.
- 💡 Lighting: Take photos in a bright room during the day, facing a window if possible. Make sure light is in front of you, not behind.
- 📱 Camera: Use your phone’s back camera (higher quality than the selfie camera). Ask someone to take the photos if possible.
- 🙆 Posture: Stand straight, keep your head still except when changing angles.
2. Your Look
- ✨ Face: No filters or beauty mode. Wipe lens before shooting.
- 💄 Makeup: If needed, only very light BB cream and light blush.
- 👱 Hair: Tie hair back so your face is clear.
- 👓 Accessories: Remove glasses, masks, earrings, or hats.
3. Tips
- 🤳 Take each photo from about 1 meter away.
- 🖼 Make sure your whole face and neck are in the frame.
- 📂 Save the photos in order, labeled by angle.
- 📤 Send them to us without editing, cropping, or compressing to
marketing@jebeauty.net - TITLE: Model_Your_Name_D01
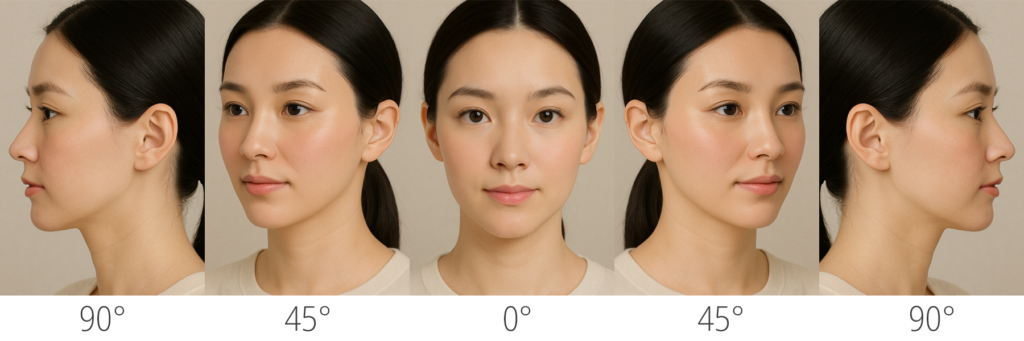
Face (facelift, face fat graft, forehead lift, threadlift, buccal fat removal etc.)
Please provide all angles:
- Front View (Eyes Open) – look straight at the camera.
- 45° View (Both Sides) – turn your head slightly left, then right.
- Side View (90° Profile, Both Sides) – turn fully to the side, left and right.
- (Optional) A gentle smiling front view.
Photo example
Video example
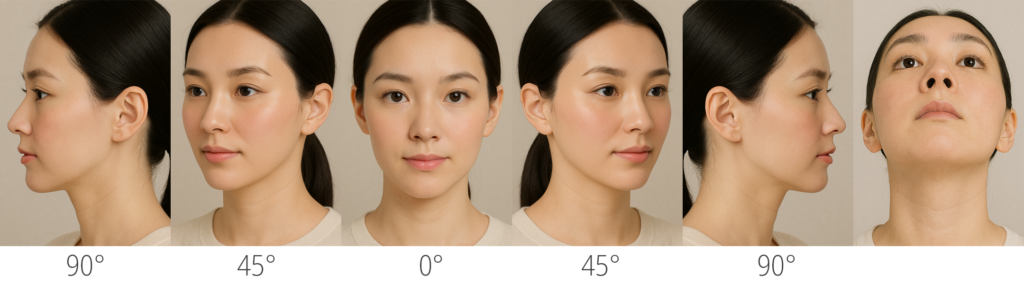
Nose (in case you did any nose surgery)
Please provide all angles:
- Front View (Eyes Open) – look straight at the camera.
- 45° View (Both Sides) – turn your head slightly left, then right.
- Side View (90° Profile, Both Sides) – turn fully to the side, left and right.
- Head Up (Base View) – tilt your head back so nostrils are visible and even.
- (Optional) A gentle smiling front view.
Photo example
Video example
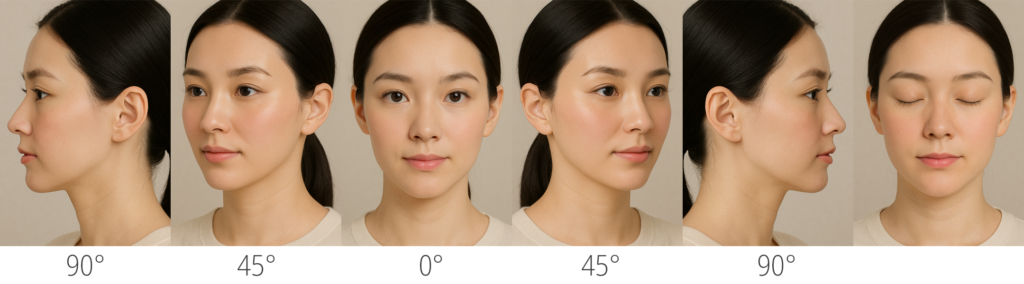
Eyes (in case you did any eye surgery)
Please provide all angles:
- Front View (Eyes Open) – look straight at the camera.
- Front View (Eyes Closed) – gently close both eyes.
- 45° View (Both Sides) – turn your head slightly left, then right.
- Side View (90° Profile, Both Sides) – turn fully to the side, left and right.
- (Optional) A gentle smiling front view.
Photo example
Video example
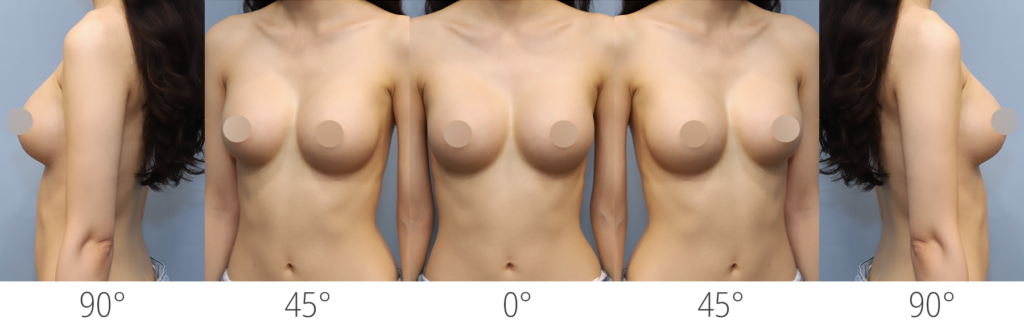
General Photo Guidelines (Breast & Body):
1. Setup
- 🪞 Background: Stand in front of a plain wall (white, beige, or light color). Avoid clutter.
- 💡 Lighting: Take photos in a bright room during the day, facing a window if possible. Make sure light is in front of you, not behind.
- 📱 Camera: Use your phone’s back camera (higher quality than the selfie camera). Ask someone to take the photos if possible.
- 🧍 Posture: Stand straight, keep your body still except when changing angles.
2. Your Look
- 👕 Clothing: Wear underwear or garments that clearly show the treatment area.
- 🫁 Breast: Frame from the belly button up to the neck. Face is not needed.
- 🧍♀️ Abdomen / Liposuction (belly): Frame from just below the bra line down to the underwear line, making sure the underwear edge is visible.
- 🦵 Thighs: Take full shots of the thighs, including front, back, and sides.
- 💪 Arms: Hold arms slightly away from the body so the entire area is visible (front and back).
- 🎭 Accessories: Remove jewelry, watches, or clothing that could block the treatment area.
3. Tips
- 📏 Take each photo from about 1.5 meters away.
- 🖼️ Make sure the entire treatment area is in the frame (e.g., from belly button to neck for breast, from waist to hips for abdomen, full thighs, full arms, etc.).
- 📂 Save the photos in order, labeled by angle (front, side, 45°, back).
- 📤 Send them to us without editing, cropping, or compressing to marketing@jebeauty.net.
- 📝 TITLE: Model_Your_Name_D01
Photo example